IMPORTANT: Do not run nnconfig.exe. The Network Node uses an M1-3200 blade that has a built-in web server for configuration. Read this information carefully for instructions on configuring network settings and connecting an M1-3200 blade to an Elements gateway.
Obtain the Node Network Configuration
Obtain from your network administrator:
Static IP address for the node (not needed if you plan to use DHCP for dynamic IP addressing)
Network mask and network gateway address
IP address for your Elements gateway (Can be obtained from the Elements gateway details screen.)
Connect to the Node and Change the Default Password
Use an ethernet cable to connect the computer and the ethernet port on the M1-3200 blade.
Change the IP address of your computer to an address on the 192.168.0.x subnet.
Navigate to the configuration web page by browsing to the Network Node’s default IP address: 192.168.0.251.
Enter the password admin to log into the web server and display this page:
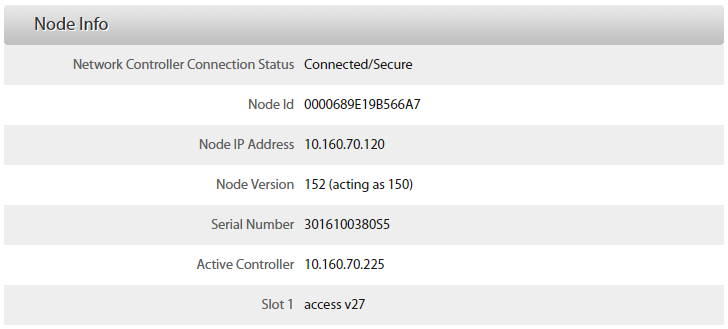
Record the Node Id number to use for identifying the node in the Elements user interface.
Enter the current login password, enter and re-enter the new password, and select Change.
Do not leave the password at the default admin.Select any or all check boxes under Security Policies.
Select Update.
Configure Node Network Settings
Select Network to display this page:
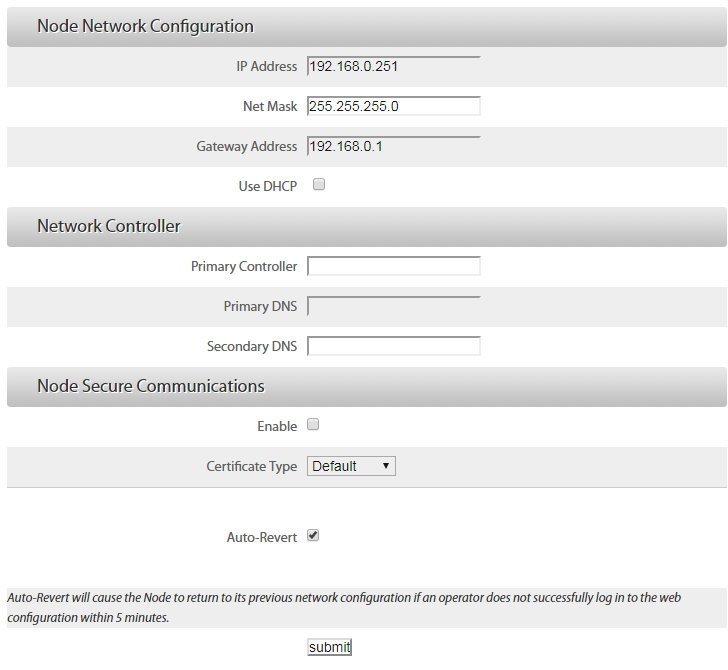
IP address set up options:
To use a static IP address for the node: Enter the new IP address, network mask, and gateway address for the node; and leave the Use DHCP check box unselected
To allow the network to set the node’s IP address dynamically: Leave the IP address, network mask, and gateway address at their defaults; and select the Use DHCP check box.
Enter the IP address for your Elements gateway.
If the gateway is configured to use a DNS name, optionally, enter the DNS name.(Optional) Clear the Auto-Revert check box to disable the Auto-Revert feature.
This feature causes the node to revert to its previous configuration in five minutes. If Auto-Revert is enabled and you have configured the network settings incorrectly (resulting in an inability to connect to the node), it will revert to the last known configuration.Select Submit and close your browser window.
If you left Auto-Revert enabled, and you are confident that the network configuration is correct, you must log into the web server again within five minutes to prevent it from reverting to the previous configuration.
To log in again, you can either switch your computer to the node’s new subnet, or access the node from another computer on the node’s new subnet.
IMPORTANT: If you are unable to sign in to the Network Node because the system IP address or login name and password are unknown, you need to use the Revert button to reset the controller’s network and login factory defaults. Hold down the Revert button for at least 10 seconds. When the four LEDs next to the button begin blinking on and off at the same time, release the button and the reversion will occur, returning the Network Node to its factory default settings.